Project Showcase
Welcome to the Semper Fix Instrument Repair showcase! Here you'll find a collection of projects I've been working on. Each project features plenty of photos and short descriptions to guide you through the repair process. Experience the precision of a Marine Repair Technician as you follow along step-by-step.
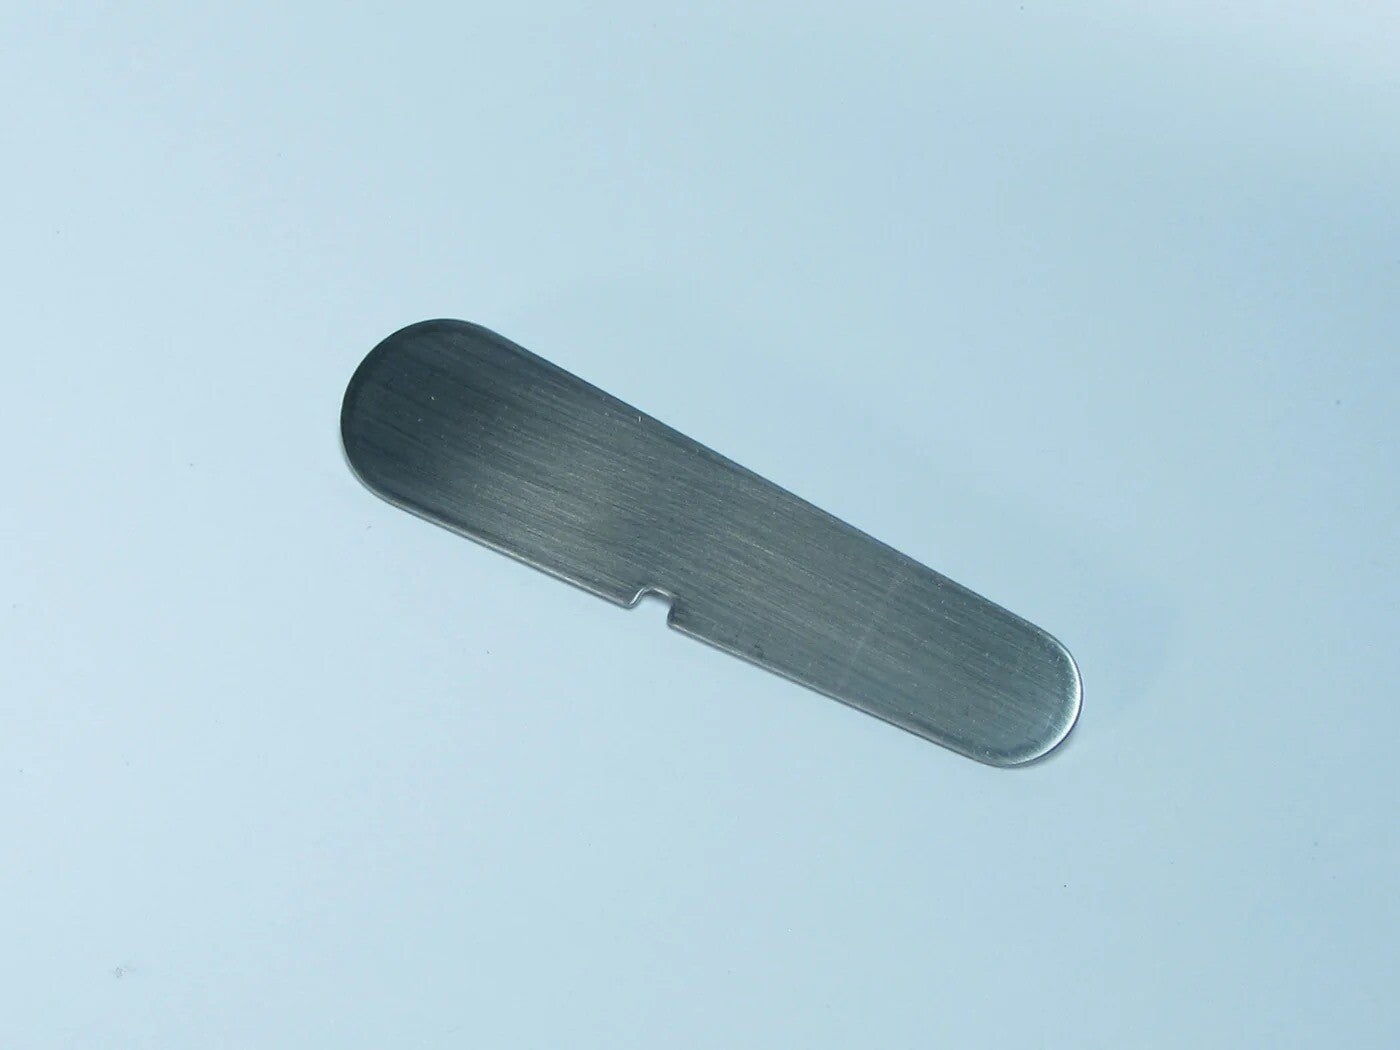
Making Small Pad Slicks
Sometimes the normal pad slick doesn't fit in the tight areas of the clarinet and we need to create our own pad slick for daily use.

Making Small Pad Slicks
Starting with a razor blade, remove the backing and draw the desired pad slick shape. A good idea is having a more senior repair tech allow you to borrow their own slicks as a template.
Making Small Pad Slicks
Using a stone wheel in the bench motor, we are going to shave away all space to be left with the desired shape. Do mind the sharp edge. Safety First!
Making Small Pad Slicks
After getting the rough outline of your shape, use a cratex wheel to do your final touch-ups.

Making Small Pad Slicks
For something like a duck bill shape, you can use calipers to check that your "bill" is parallel.

Making Small Pad Slicks
Take a slip of crocus cloth or 600 grit sand paper and remove and smooth out whatever flashes you may have. You will want this comfortable in your hands when in use.
Making Small Pad Slicks
Bask in the simple creation of your new pad slicks!

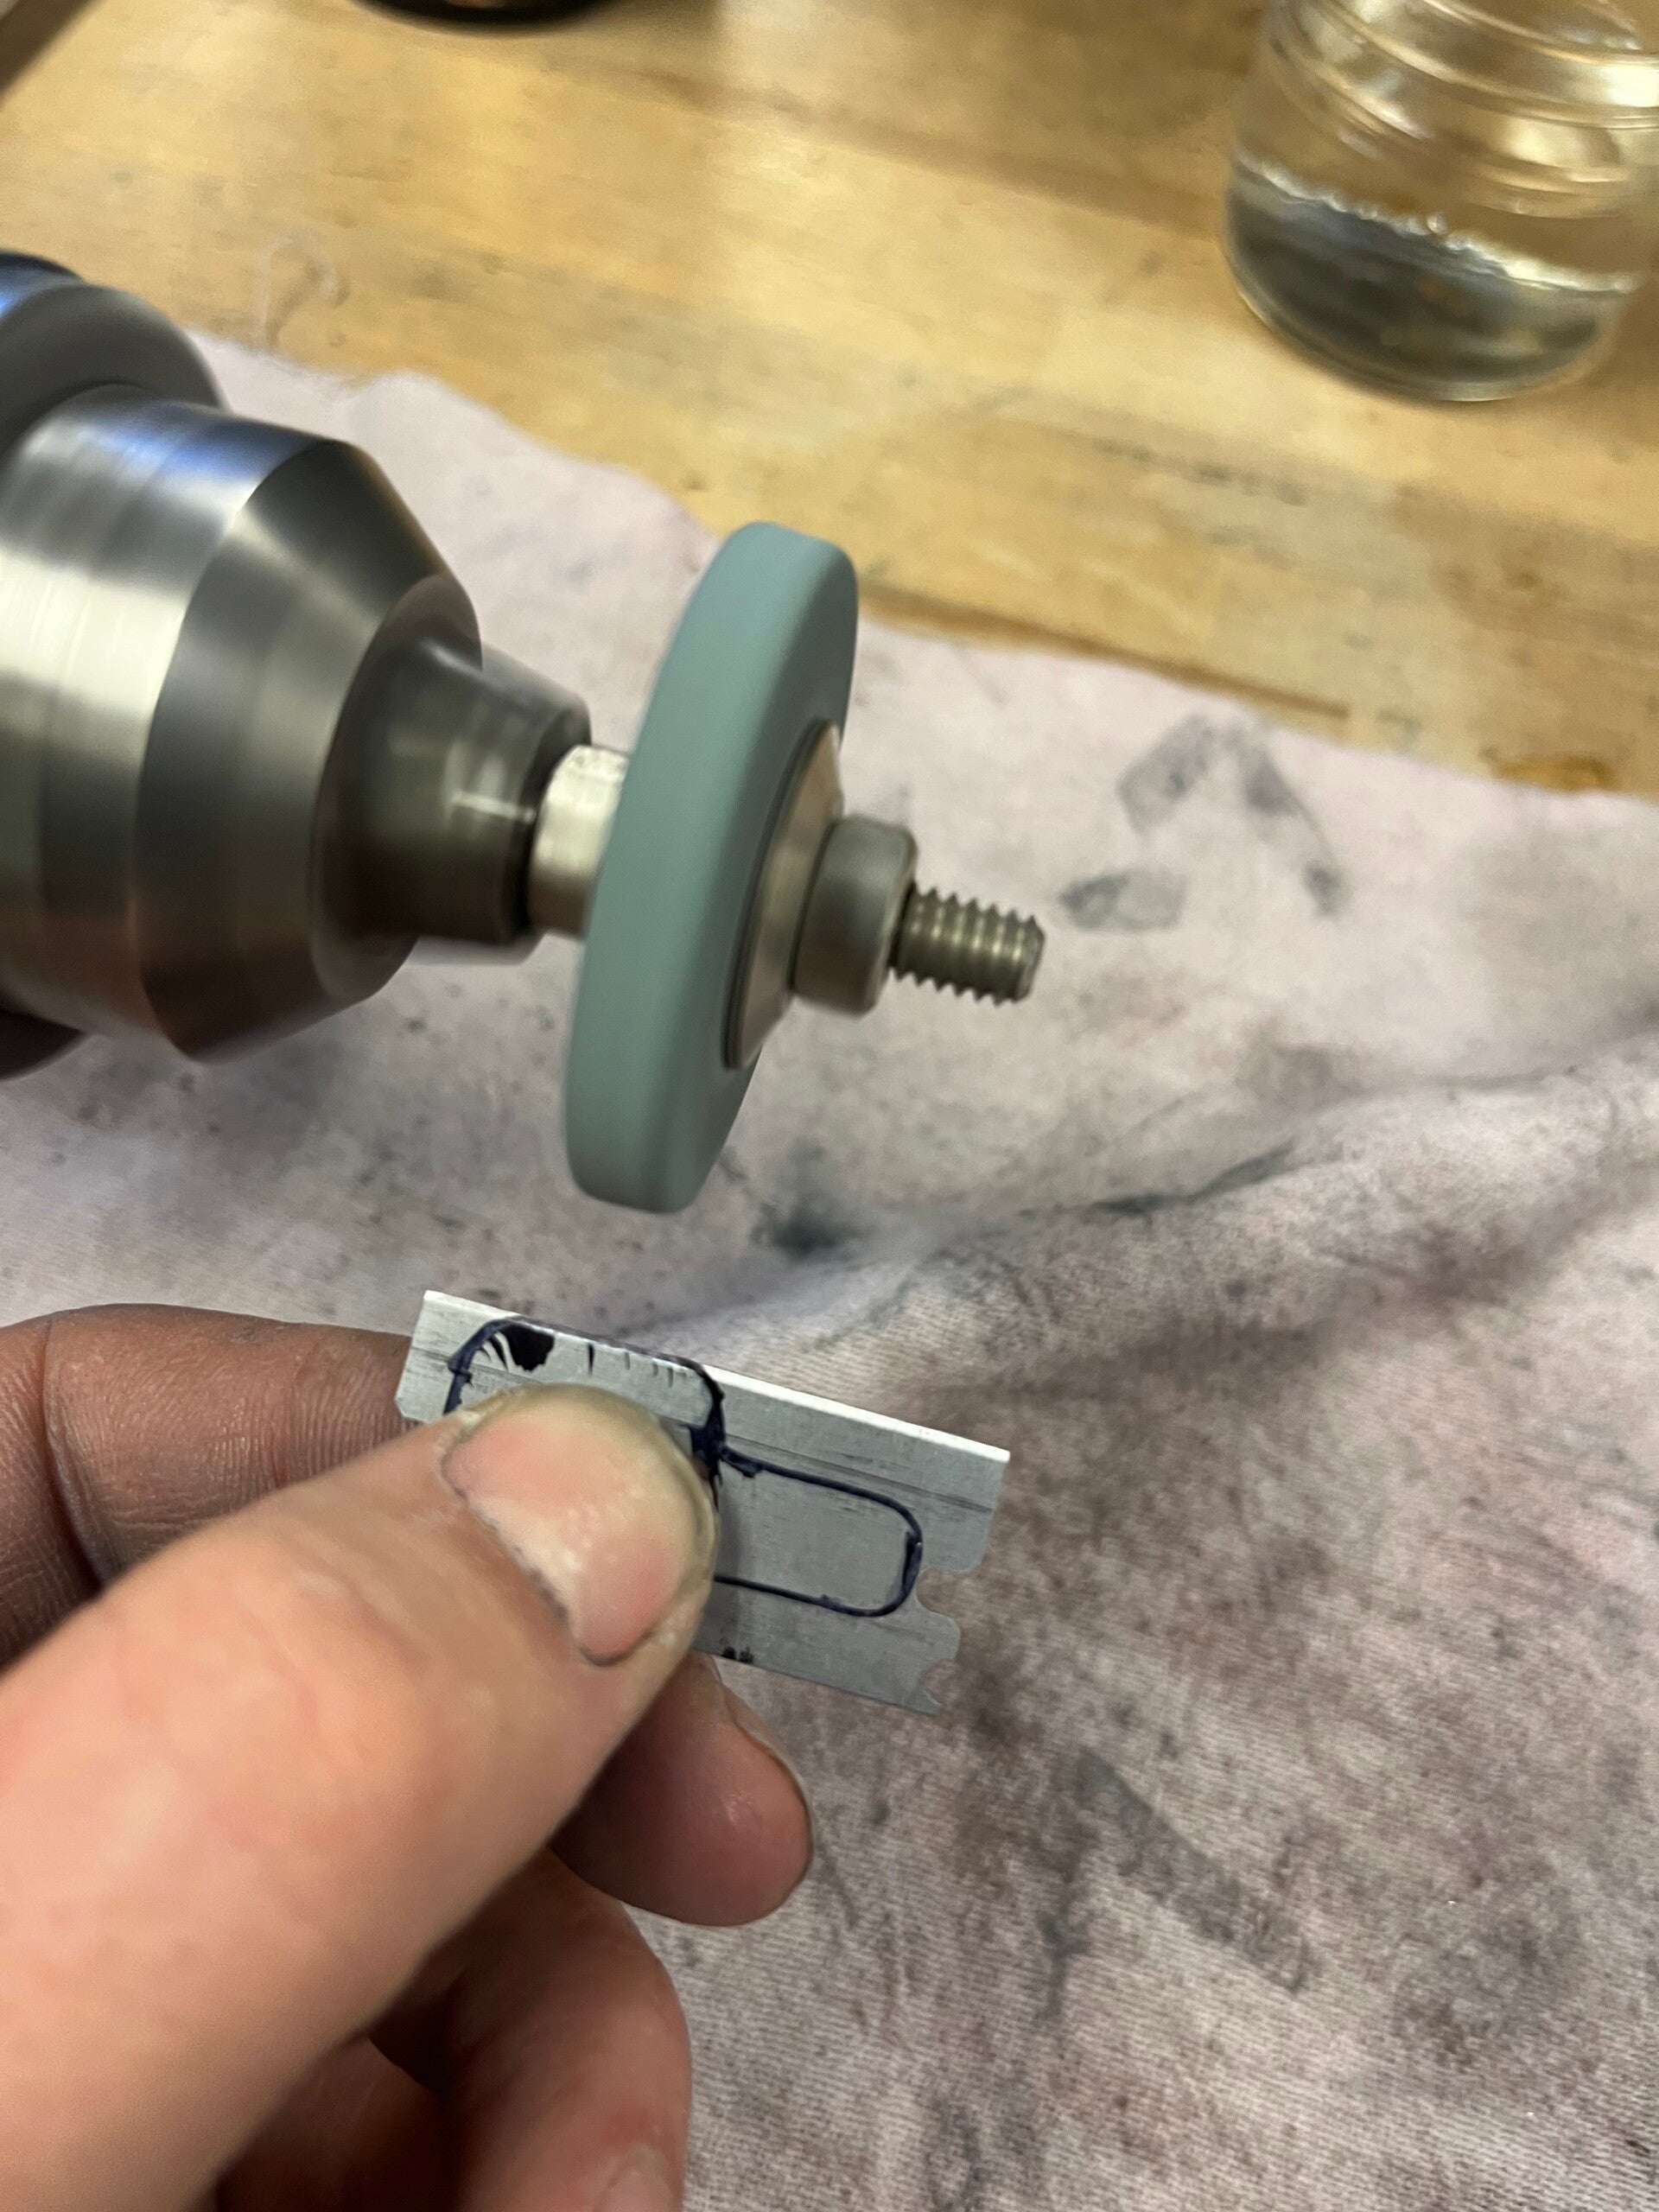
Making a Feeler Gauge
Feeler Gauges are excellent tools at our disposal to create and use in ensuring the proper seal on a clarinet key pad. Made with a simple 0.001" thick feeler gauge material, these are a forever staple in our industry.

Making a Feeler Gauge
Starting out, you will need: a .25" wood dowel, small strand of 0.001" feeler gauge material, your bench motor, a razor blade, high quality clear glue, and a smooth file. It is also a good idea to have your machinists block and tweezers if you have it.

Making a Feeler Gauge
With the dowel in the bench motor and under power, use your smooth file to dome off both sides of the dowel. The end result should look like this.
Information
We pride ourselves on our adaptability and commitment to excellence in every aspect of our service. Explore what we have to offer and how we can contribute to your success.
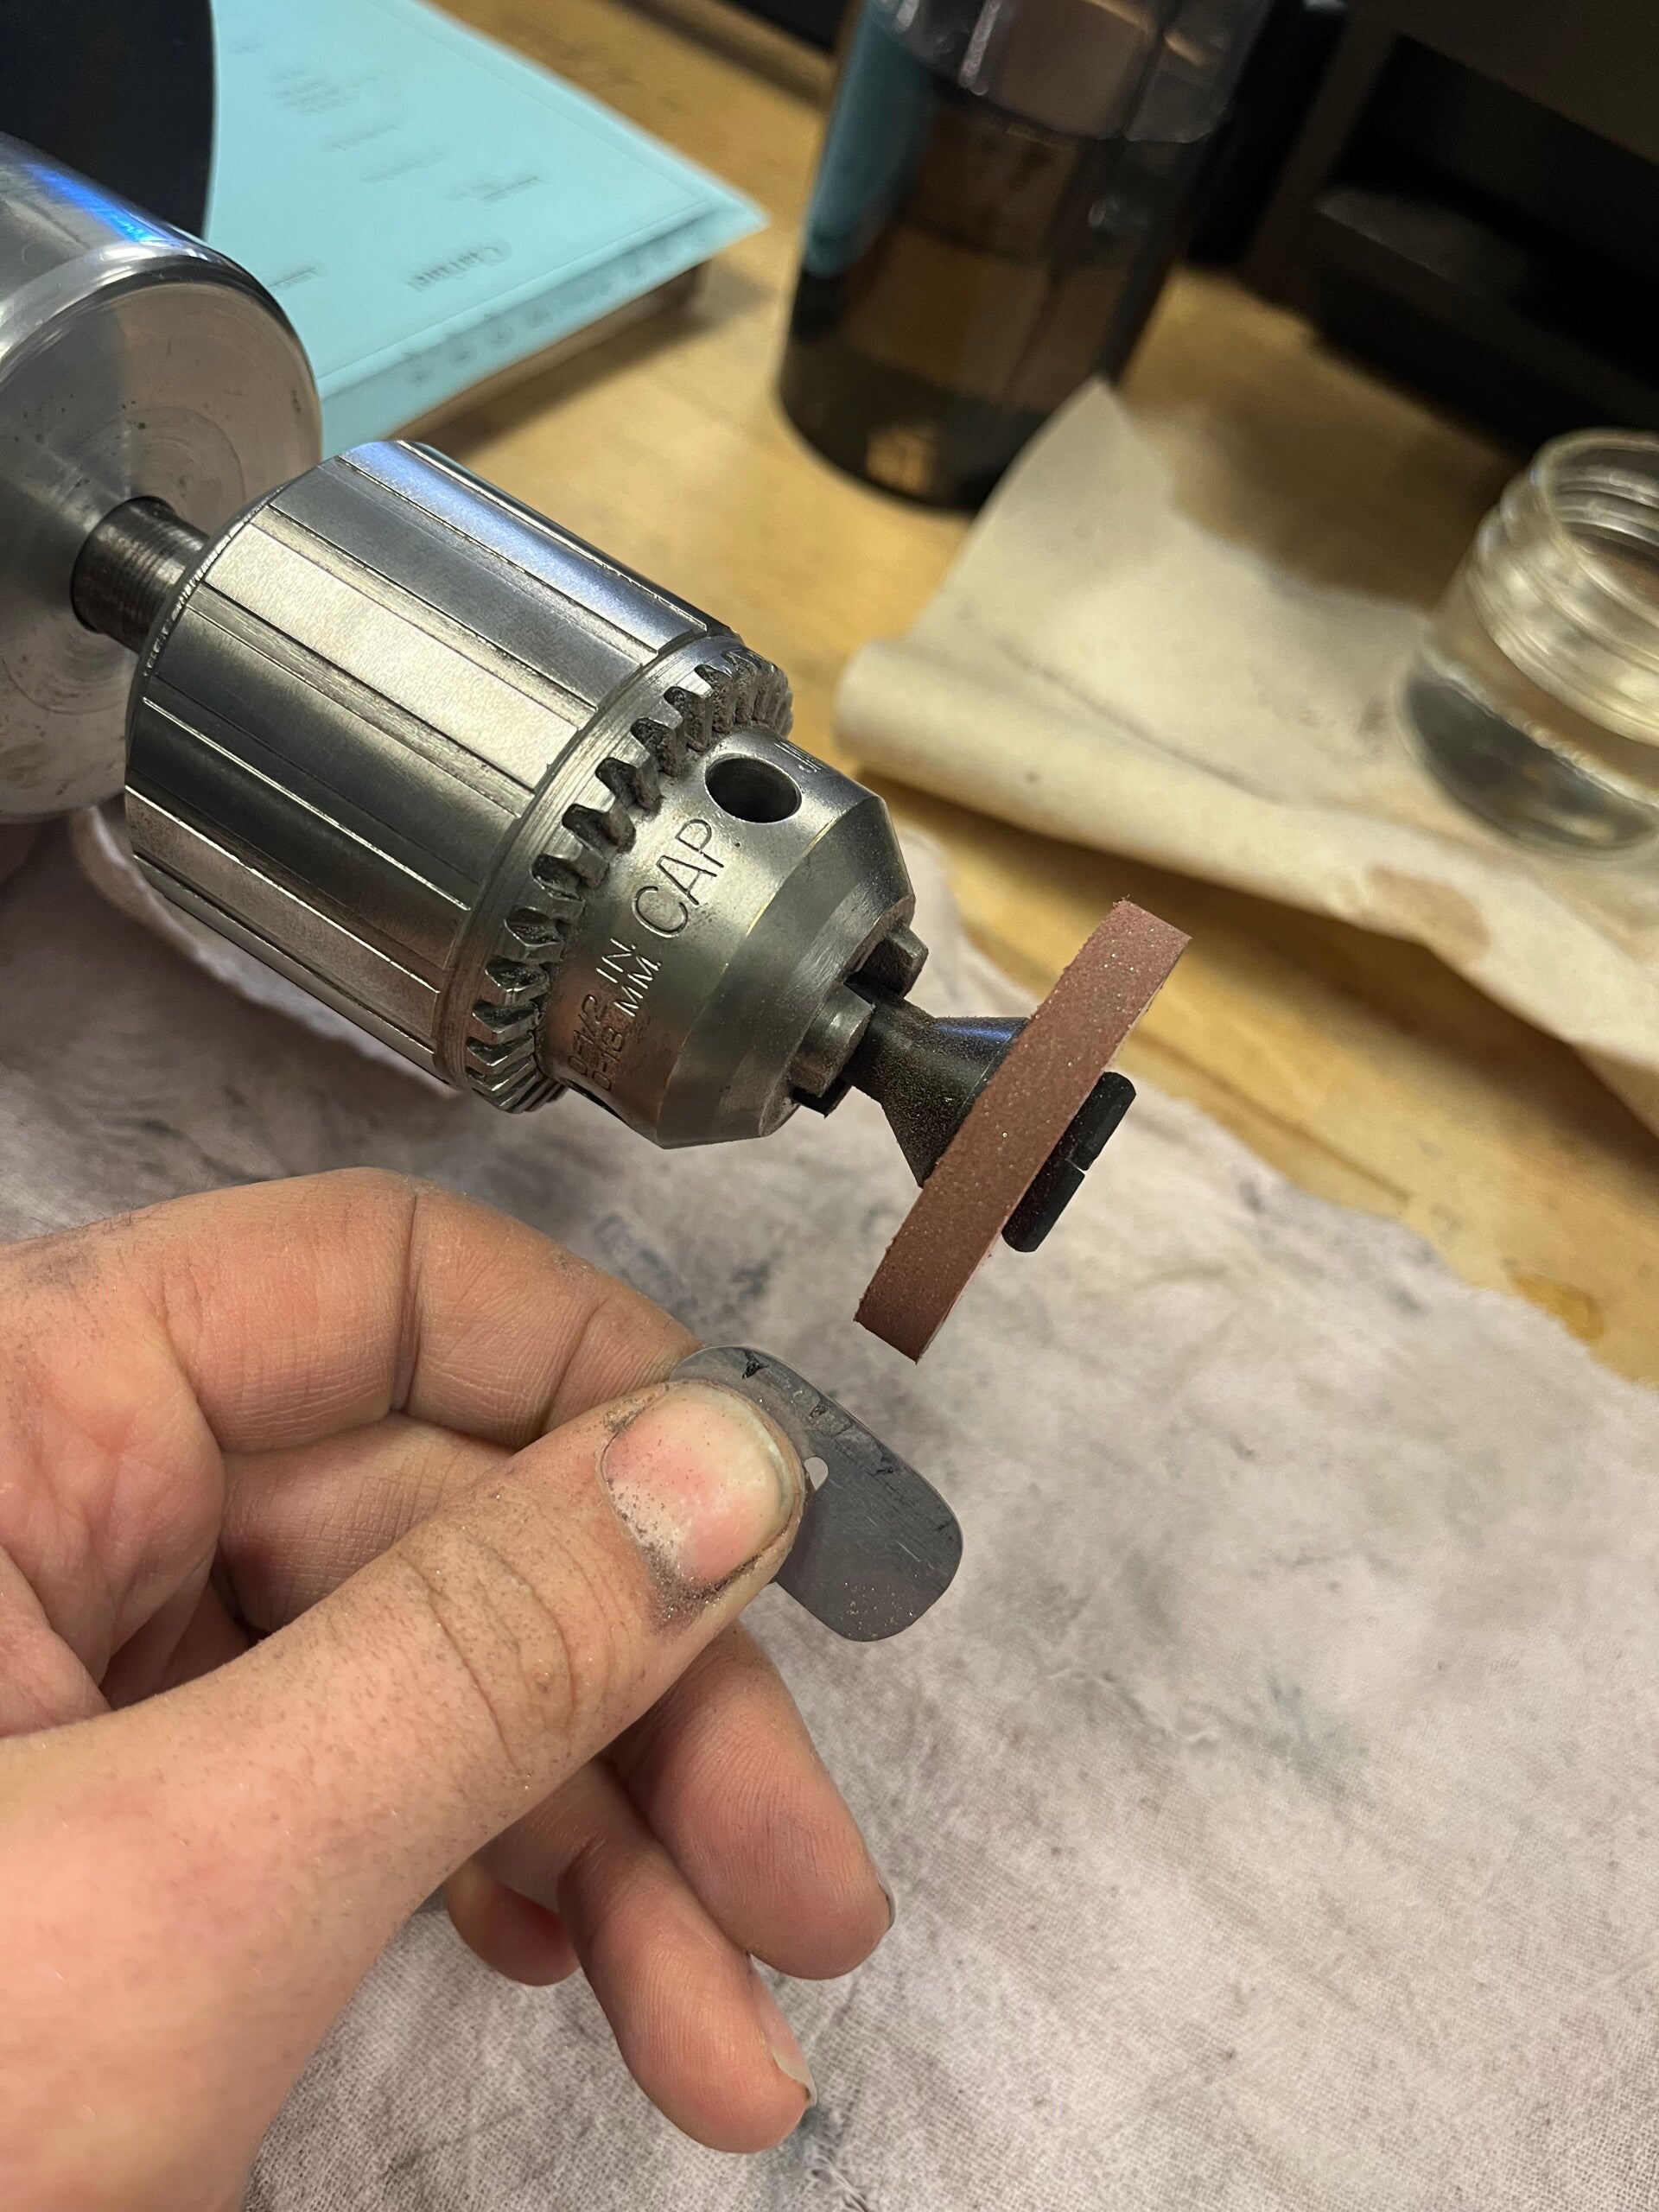
Making a Feeler Gauge
Now we are going to add a small dollop of glue to the dowel and press the dowel down onto the feeler gauge. After, rinse and repeat the process with another bit of glue to cover the gauge and the dowel.

Making a Feeler Gauge
After adding your glue, take your razor again and clean un the random strands and keep up our attention to detail.
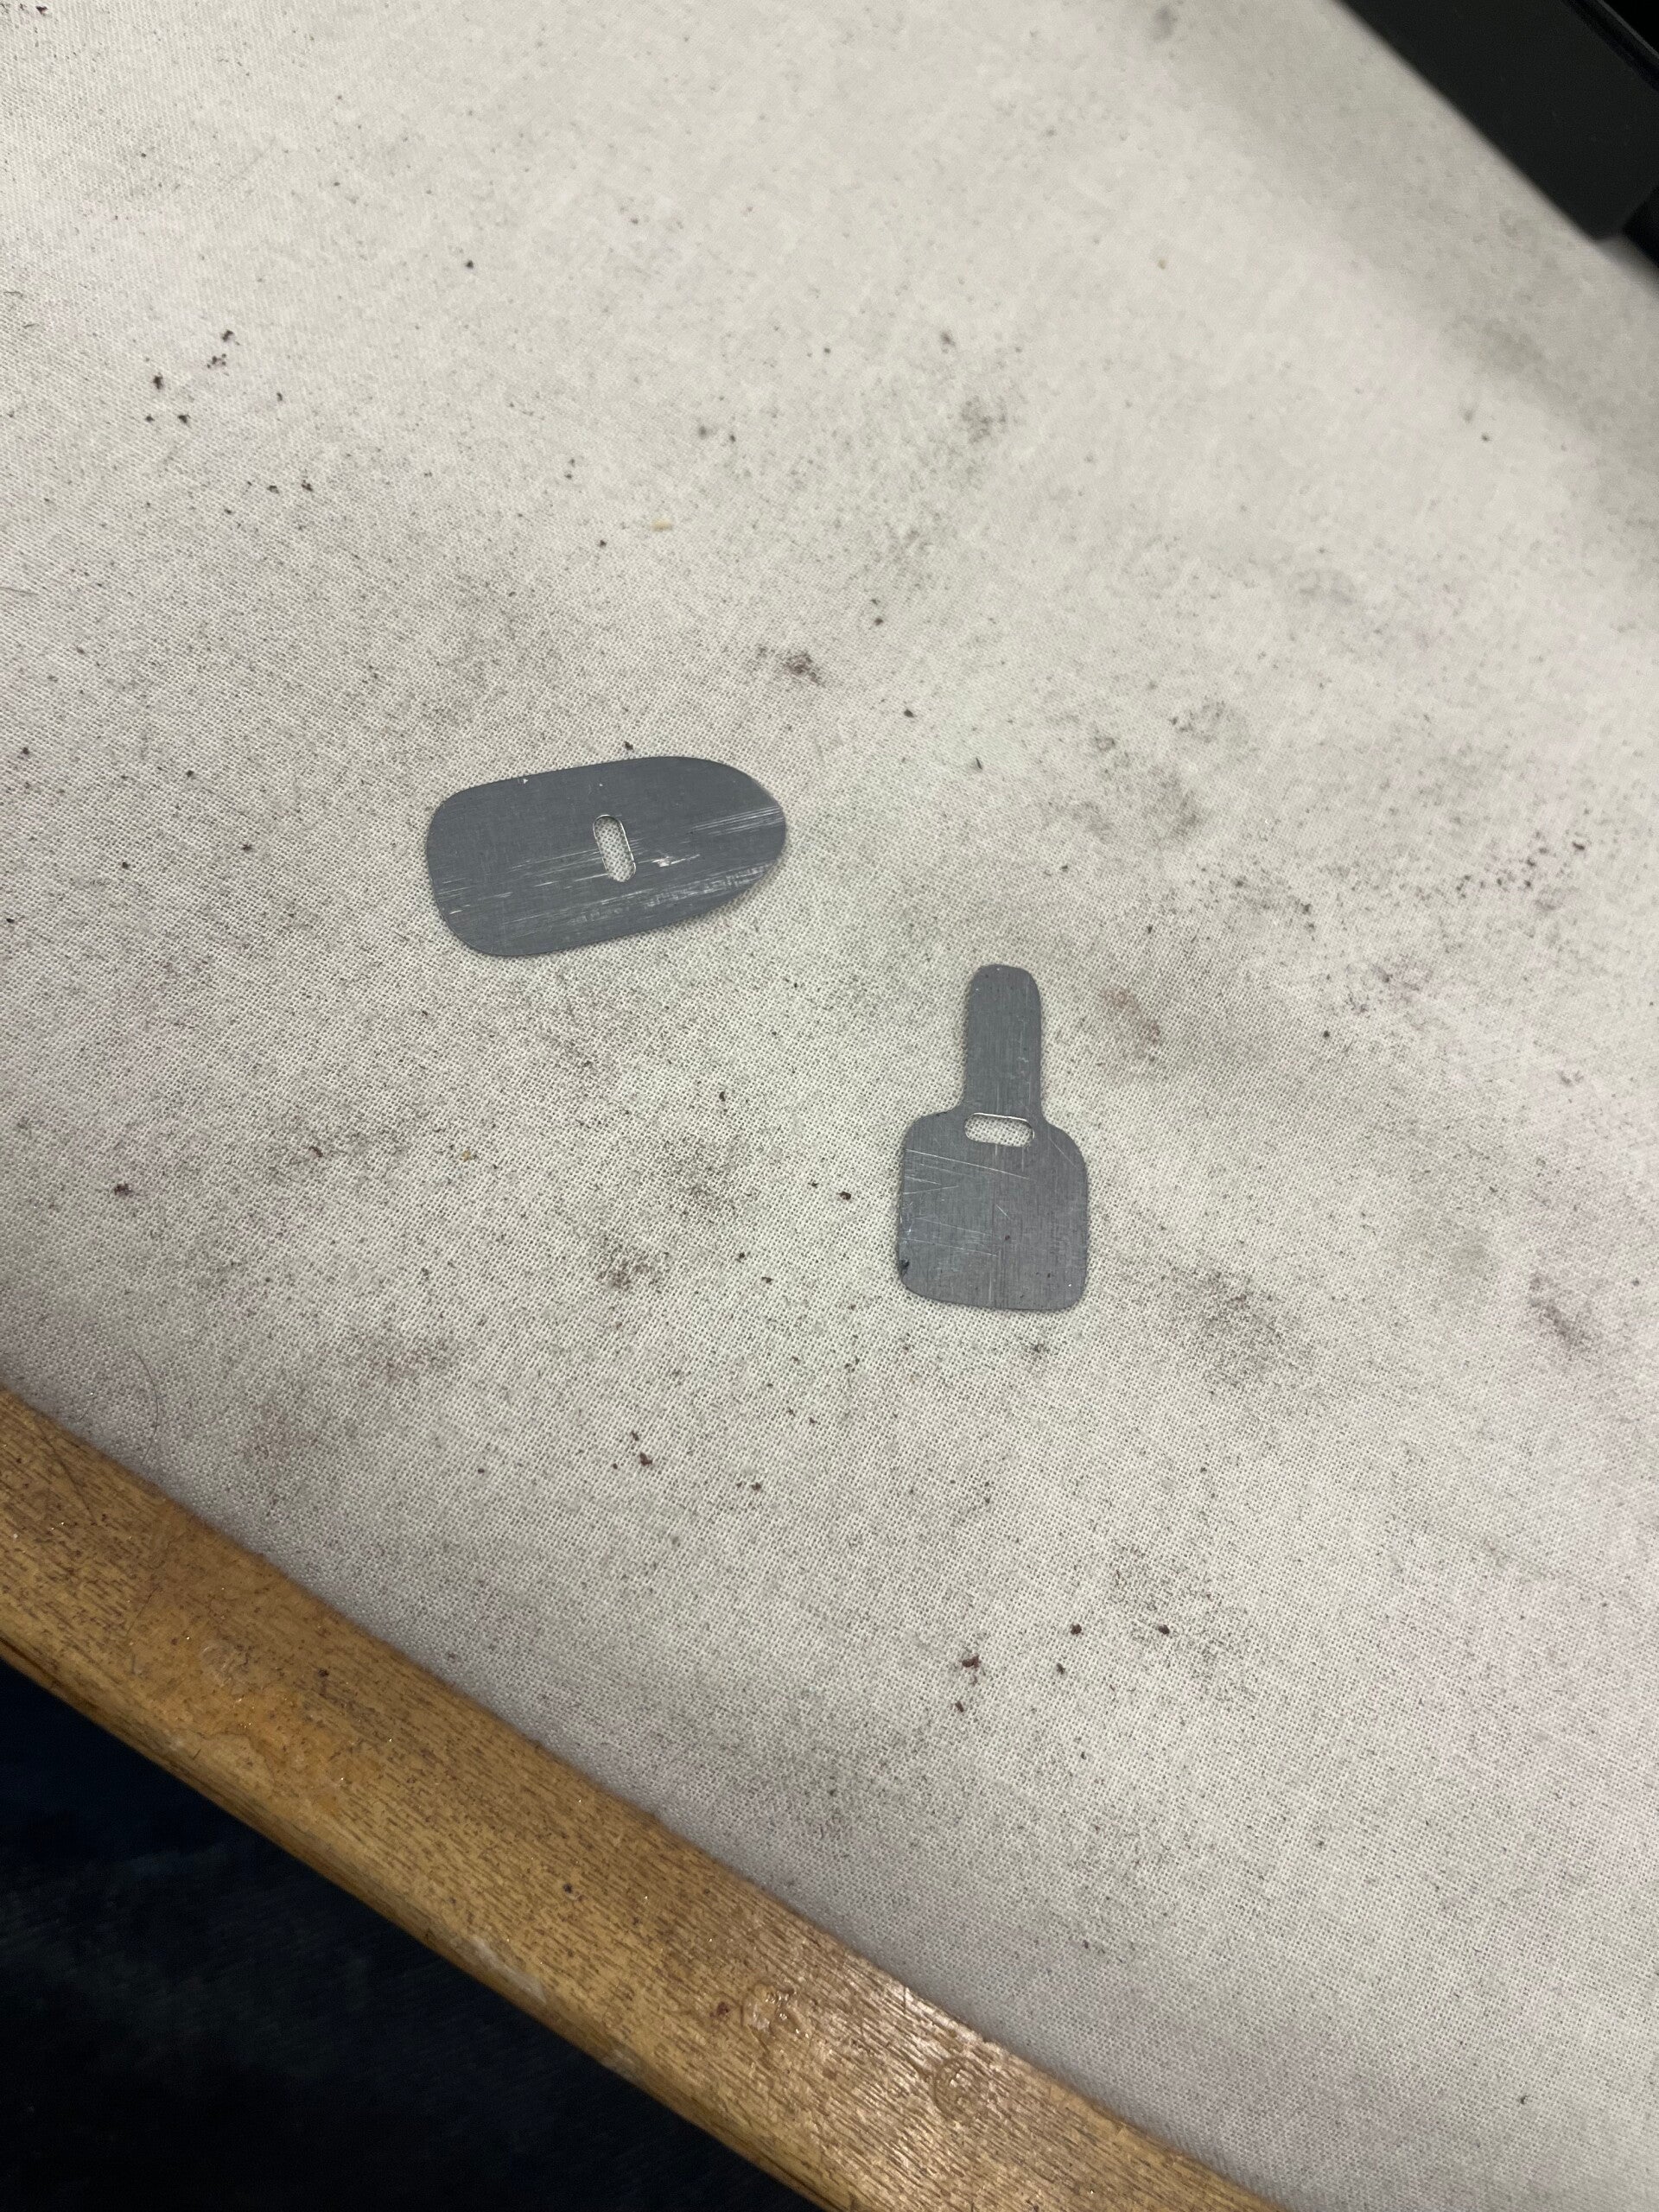
Making a Feeler Gauge
And there you have it! a simple tool for an incredibly important task. After every feeler gauge thats made, take time to remind yourself of good feeler gauge techniques and use the lightest tough possible!
Replacing Cork on a Clarinet Key
Adding or replacing cork on a clarinet key is incredibly common amongst all level of players. From wear and tear to complete overhauls, this is a common place requirement for completing play conditions on an instrument.

Replacing Cork on a Clarinet Key
Things that are good to have on hand for this job will be appropriate thickness of cork, a razor, cutting block, machinist block, denatured alcohol, and contact cement.


Replacing Cork on a Clarinet Key
First thing is to remove and clean up your key. You can use your razor to get all of the cork and previous glue off. A good help is using denatured alcohol to help break up the glue from the key.
Replacing Cork on a Clarinet Key
Observe the condition of the key. If it looks unscathed, you may need to mar the contact point of the key to allow the adhesive to have something to grab onto rather than the slick nickel plating that is commonly seen. You can do this with sand paper or place scratches with a screwdriver.

Replacing Cork on a Clarinet Key
Once the surface of the key is prepped, add contact cement to the desired area and a portion of your cork sheet and allow the adhesive to cure. This wait is usually 5-10 minutes. You. can test by using the side of your finger and you should get a tacky feel with a small pull from the cork.
Replacing Cork on a Clarinet Key
Now that everything is ready, place and press your key onto the cork and cut a small square around the key that you are going to shape soon. Cutting the small square will allow you the hand dexterity needed for a clean cut.
Replacing Cork on a Clarinet Key
Now take a new razor and begin to shape your cork. The goal is to have one clean cut along a side with sharp edges. This is something that may take a couple of attempts to get right and this may mean starting all over with new cork on the key. Be patient and things will work out.
Replacing Cork on a Clarinet Key
Check over your work and make any additional cuts as said before and you can move on to placing key into your clarinet and beginning to fit to ensure its meeting the proper function for whatever key you are adding your cork to.

Replacing a Key Pad
Like all other woodwind instruments, the clarinet is no stranger to needing a their key pads replaced. This process, while simple, is the heart and soul to a clarinet being able to go from not playing at all to being a musicians voice.


Replacing a Key Pad
This process will require the correctly sized key pad (a bladder pad or synthetic), a heat source, poker, screwdriver, some q-tips, high quality clear glue, and your feeler gauge.
Replacing a Key Pad
Using either a torch or pad cup heater, heat up your key and remove the old pad. This is where we need to clean up the surface and remove all the old glue from the key.


Replacing a Key Pad
Observe for any missed glue, but also take a look and see if you need to add marring to the key cup for the glue to grab hold better. This can be done with your flat head screw driver.
Replacing a Key Pad
Choosing the appropriate size pad is important. There are two factors to remember. Width and thickness. In this case, we want a bladder pad where the lip sits over the pad skirt and is the same thickness as what was previously used.


Replacing a Key Pad
Using your small poker, place two vent holes in the middle of the pad and use the poker to hold the pad in place while you add glue to the back of the pad. Warning: do not let glue get on the side of top of your pad.
Replacing a Key Pad
Cutting a small piece of your glue, add some to your key cup. Heat up your pad cup and insert your fresh pad. You can use your pad slick to visually level the top of the pad with the skirt of the pad cup.

Replacing a Key Pad
Now with your feeler gauge, you need to test how well you seal is on your clarinet. Use heat lightly and your pad slick to make small adjustments to get your seal. When you have achieved this, you are ready to move to whatever is the next repair for your instrument!
Repairing a Cracked Clarinet
Wooden instruments are susceptible to humidity and the expanding and contracting of wood can lead to cracks in the weak points of the clarinet. Usually found between tone holes or near the end of a clarinet, this is a must fix for any clarinet.


Repairing a Cracked Clarinet
You will be in need of a few tools to achieve success and appropriately drilling, filling, and blending to achieve the goal of the repair with minimal visible scarring. You need a center punch, a #44 drill bit, screwdriver, ruler, carbon fiber rod, grenadilla dust, very thin super glue, and saxophone pad slick.
Repairing a Cracked Clarinet
First thing is the prep of drilling into the clarinet. Notice I marked the entry point and angle that I need to drill under the crack. That circle will be where I use my center punch and begin drilling

Repairing a Cracked Clarinet
After center punching your starting point, drill directly into the clarinet 2 or 3mm. This will prepare for the next step of drilling across the crack. You need to both twist and angle your clarinet to be both be in the wall of the clarinet and along the line previously drawn.
Repairing a Cracked Clarinet
Now is the time to put that practice to action. Once your angle is set with your drill bit, drill your hole a little bit at a time in order to not overload your bit with dust. The goal is to drill a hole between 14 - 18mm.

Repairing a Cracked Clarinet
Check and observe the finished product. You are looking for a teardrop at the start of your hole.
Repairing a Cracked Clarinet
Next will be preparing the carbon fiber rod by inserting into the hole and marking how far it reaches out. Place this rod into the bench motor and make a small cut in the rod to make it able to be broken.

Repairing a Cracked Clarinet
With a smooth motion and the rod in the bench motor, you will push and twist to break the excess rod off the clarinet. Now it is time to fill the rest of the hole with grenadilla dust.
Repairing a Cracked Clarinet
Now you will be taking the time to fill the hole and alternating grenadilla dust and glue with the sax pad slick and screwdriver. You can place your glue in a cup of paraffin wax to help the glue's life span. Packing tightly you want a small bound as seen here.


Repairing a Cracked Clarinet
Now we are going to begin sanding down and blending the grenadilla dust into the clarinet. We need a small square of blue tape to protect the body of the clarinet. Starting with a file we will slowly go lesser in grit and widen the sanding area.
Repairing a Cracked Clarinet
You will sand in the visible square both perpendicular to the clarinet and then parallel blending all the marks. Once you finish with a particular grit, open up the square a little more and go up in grit and repeat the process.


Repairing a Cracked Clarinet
At 1000 grit, you can remove the tape and sand and blend a larger area with the goal of finishing with 2500 grit.

Stories told in pixels
After blending with your 2500 grit, take a little oil and coat the clarinet to rehydrate the body and enjoy your finished product and a clarinet ready to be utilized by your musician.